Hi everyone!
I have been receiving many emails about how to make the faces, and probably many of you aren't quite finishied due to that matter...anyway, (I want to take a looksy to your dolls finished, COME ON SEND ME SOME PICS) :( hhaha, anyway I have update the procedure part with a video explaining how to pass the graphics onto the fabric :D
P.S: that was your doll on process Addy XD
Saturday, May 13, 2006


Saturday, April 29, 2006
A tribute to Addy
Just because weird people enters to this blog....and dear prettyful Addy made a request:
ENJOY!!!!!!!!!!!!!!! THE FAT ASS DISGUSTING NOT SEXY BILLIE JOE (warning era...MY FAVORITE ERA...) :D

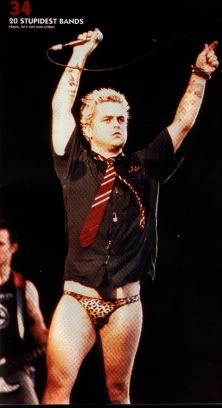

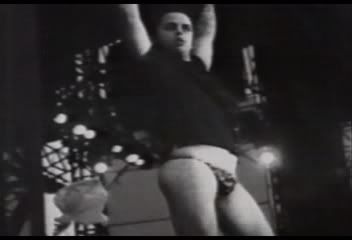
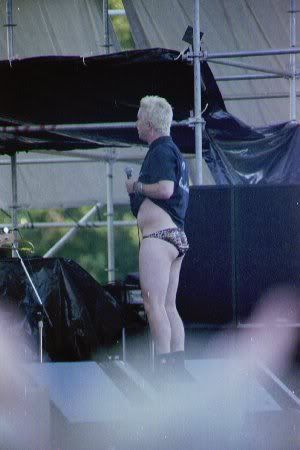 ( the leopard undies...hahaha)
ENJOY!!!!!!!!!!!!!!! THE FAT ASS DISGUSTING NOT SEXY BILLIE JOE (warning era...MY FAVORITE ERA...) :D
( the leopard undies...hahaha)
Wednesday, April 19, 2006
Pschology 101
Yesterday I read the most weird comment, besides the emails that appear on the Daily WTF email on the GDC, this was particullarly odd, somebody with a really distortioned perception of the reality enter a comment about the GD dolls :O .... what it seem weird to me, is that the comment was completely out of context, she posted it on an archive in which I was talking about making new dolls, and I was going berzerk with the mustache and hair chest of Freddie Mercury :D .
I understand that people may hate this dolls, and may hate this blog, and may want me to shut this out, no one really has told me that but, there must be ppl out there that thinks that this blog is stupid, and deserves to be closed, but if someone is going to tell me that this is stupid and must be closed at least give me a good reason. If the reason why you want me to close this is that I make GREEN DAY LOOK FAT (God all might who would want that!..haha)....just save your time and don't enter a comment, this site is for mentally healthy people, not for the disturbed ones. :)
I understand that people may hate this dolls, and may hate this blog, and may want me to shut this out, no one really has told me that but, there must be ppl out there that thinks that this blog is stupid, and deserves to be closed, but if someone is going to tell me that this is stupid and must be closed at least give me a good reason. If the reason why you want me to close this is that I make GREEN DAY LOOK FAT (God all might who would want that!..haha)....just save your time and don't enter a comment, this site is for mentally healthy people, not for the disturbed ones. :)
Saturday, April 01, 2006
Thursday, March 30, 2006
More photoshop
haha, I arrive home and what do I find?.... 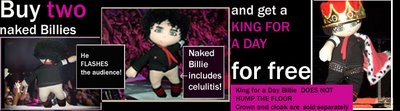

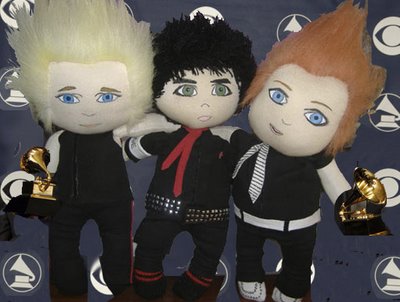
What a rip off!!!!......and these ones...receiving their grammys :)
Wednesday, March 29, 2006
UPDATES
Maru told me that Anne from de GDA forum was needing help with her doll's hair...so I have update the procedure section, now it has 3 vids explaining how to make it. I hope you can understand....my enlgish sucked, I didn't know what to say ...the worst teacher ever.
Monday, March 20, 2006
The Resurrection of Billito
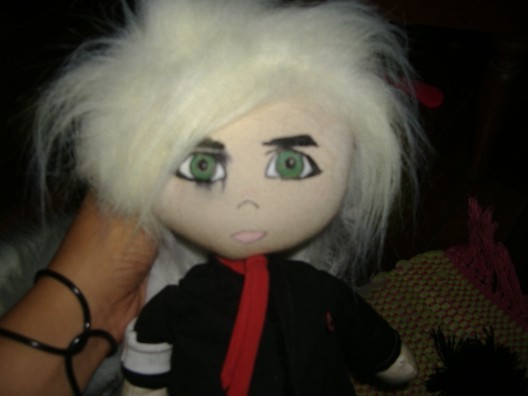
Well after the disgrace.... this is what we had left of Billito, we took a photo with the "new Billie Joe look" ...because out of despair I took his hair out in a pathetic attempt to save his face ...useless of course.
I was so upset I took his head out and wash it over and over again...I shouldn't have done that, anyway, his face was completely ruined and so was my disposition to make a new face for the doll, I swore not to make another doll ever again...(i was really upset).
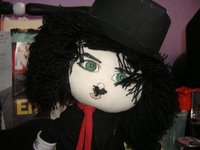
As I am insane and I like punishment and I am a masochist, I started to look at the  pictures we took of the doll previous the disaster, and I found the cutest pics ......I didn't post the pics of Little King Billie, so now is the perfect time, this is in memory of my very first handmade doll:....he never had the time to make his King for a day performance ala chipmunk :(.....meh too much drama...anyway I did reconstruct a new head for him, but, is not the same doll, he is even cuter hahaha, and well he needs a hair cut, god, I have no time.....actually I have but I like to linger too much....blah blah....
pictures we took of the doll previous the disaster, and I found the cutest pics ......I didn't post the pics of Little King Billie, so now is the perfect time, this is in memory of my very first handmade doll:....he never had the time to make his King for a day performance ala chipmunk :(.....meh too much drama...anyway I did reconstruct a new head for him, but, is not the same doll, he is even cuter hahaha, and well he needs a hair cut, god, I have no time.....actually I have but I like to linger too much....blah blah....Well, here is the new Billie, Billito Lazaro as we have named him....he is styling the Chaplin look with the hat we made for Trecito before he had his rad reddish hair....and, that's it.....Maru is still working on the face for Freddie and a Harry Potter one......with Daniel Raddclieff's face....
Sunday, March 12, 2006
The Horror
Buaahhhh... yesterday while working on the computer, my dear Maru came up to me with a bowl of grapes.....well, my desk was a mess and there was no descent space to place the bowl, so she moved the dolls and put the bowl near little Billie's face.....a tragedy started, she took back the bowl and noticed that Billie's face was wet.....and oooh the horror, the black lines of one of his eyes were running!!!!!....yes...I forgot that I used a freaking water marker! and I didn't pass the acrylic paint over the black spot outlined with the marker!!!...... :( ---- and now it looks like his mascara is running off! hahahha....well!......freaking doll!...I new that I had to re made it from the very beginning .....
Tuesday, March 07, 2006
Getting Crazy
Hehe, I like the photoshop Maru made that's all,
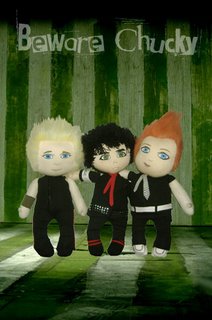
and ooh she also made a video about little Tre singing Food around the corner ala chipmunk. I had a few laughs with it. the lighting is horrible but if you wanna take a looksy to the thing here it is:
(is it taking too long to load? doubleclick on the center of the image)
And this is the picture selected to make Freddie's doll, (the face), we are still thinking about the outfit.......ideas here, we accept ideas. 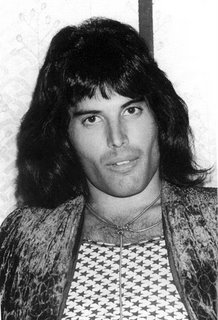
Friday, March 03, 2006
The Wardrobe
Dressing them up:
I have draw the basic outfit: pants and shirts, long and short sleeve, the dotted line is the guide for stitching, remeber that you must make a hem for the pants at the waist and also for the legs openings, also hems for the shirts on the sleeves and for the bottom of it.
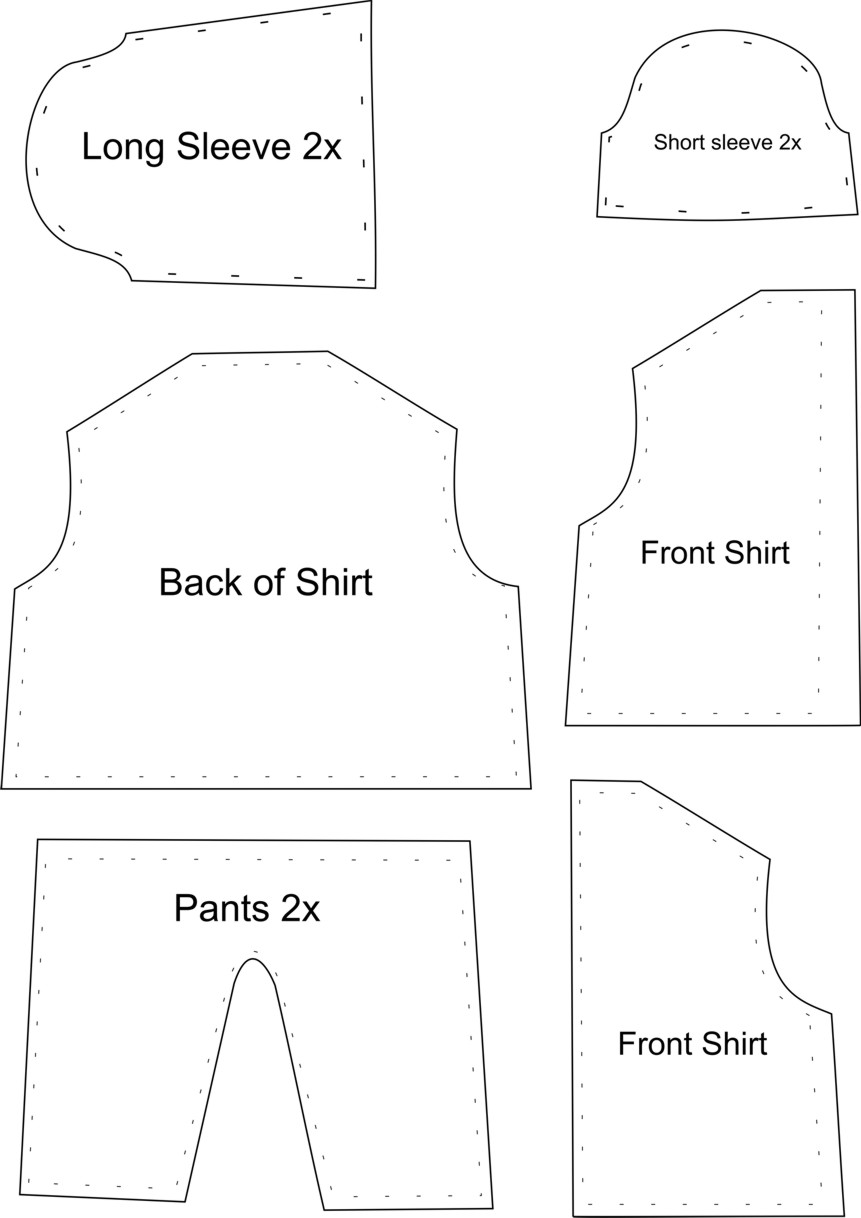
To print: fit in a A4 sheet
The shirts:
I made a long sleeve shirt for Billie, a short sleeve for Tre and a sleeveless shirt for Mike, so, to start up the shirt, start by stitching the shoulders and then the sleeves just as explained on the procedure part on how to assemble the body. to close the shirts, just use velcro and glue it to the shirt that will be enough.
The pants:
This is extremly easy, just saw the sides and make the hems.
The belts:
I used cotton twill tape for Billie's belt and I attached it to the pants, for the studs you can either glue aluminum foil cutted into small squares, or use those metal aplliques which you can iron. same for Tre's belt, actually I made his belt of what I had left of cotton jersey I just glued it.
The shoes:
Join to pieces of fabric (you can make your own pattern drawing the feet of the boby pattern) stitch and that's all. Use cotton jersey, I made a little of crosstich embroider for Tre's shoes, and Billie's shoes are actually knitted, but to avoid too much work, just use remaining fabric you may have laying around.
The ties:
Also made of remaining fabric, glue it and shape it as a tie, at the end when you've finished your doll put it around their necks and make the knott just as a regular tie.
Tuesday, February 28, 2006
PATTERNS
| |||||
About the face pattern : | |||||
What we did, was drawing with vectors the real faces on Coral Draw, if you know how to work with Corel or any other design program, great!, if not, post a comment asking for the graphics, give us your email we will send it to you, then print them and use them as an stencil ( you can do it with contact paper, or just with paper, cutting it as an stencil. (try to calculate the size of the print to match the size of the doll's head) If you are here looking to make a Freddy Mercury, Spielberg or Tom Hanks doll, hang around those dolls are on my list of thing to do. |
PROCEDURE
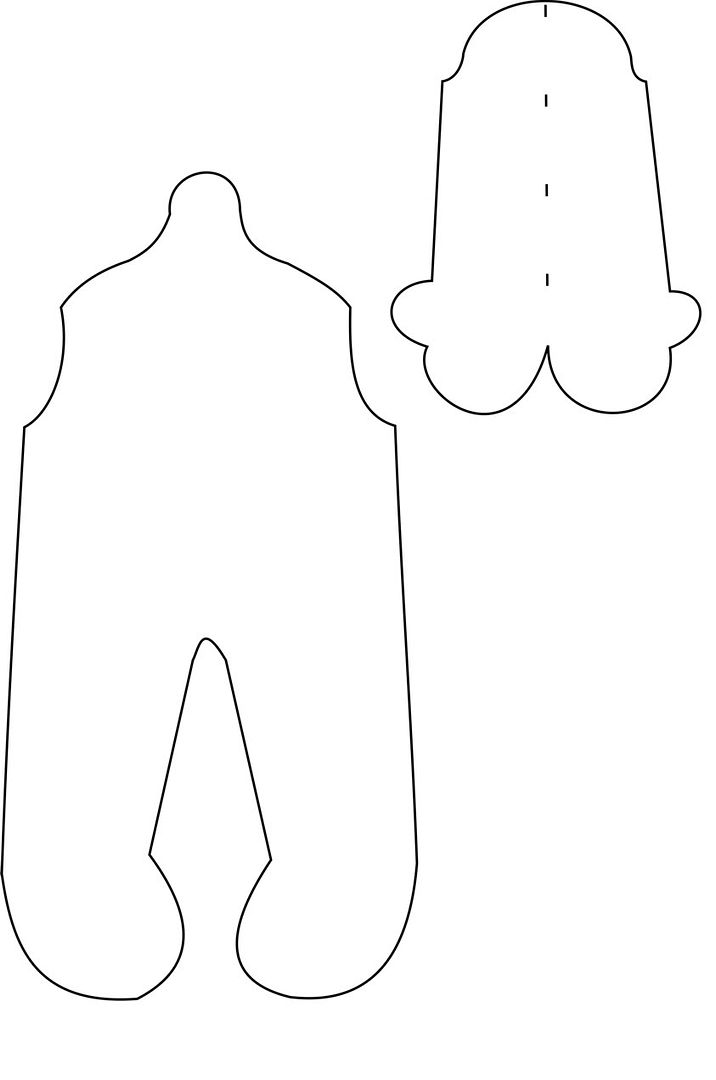
Once you've made your patterns, copy them onto the fabric, remeber you have to make two pieces for each pattern 2 for the body and 2 for the head.
Sewing

 If you don't have a sewing machine (better yet, sewing cotton with sewing machines is hell), handsew with small stitches (backstitch style), to have a almost perfect sawing, put your pieces together and fix them with pins, then mark the fabric with an outline so that you have a guide to follow, start to saw Sew the body, starting by the shoulders, then attach the arms, saw the rest of the body and leave the neck open.
Turn inside out
Stuff it with fiberfill, this might get a bit tricky, but try to stuff it with a wooden stick or whatever you have in hand fill the legs first and the fill the arms, leave a space without fiberfill between the arms and the body, it will give movement to the arms.
Fill the head lightly and Fill the neck firmly, stitch the head and body openings.
DRAWING THE FACE
Probably you are wondering how to print the correct size for the face graphic, what you need to do (I use photoshop) is choose the print preview and rezise the image about a forth of the size of an A4 sheet a bit larger maybe, print a draft and be sure the size of the stencil matches the size of the doll head, if it needs any correction resize again until you are satisfyed with the size.
Attaching the head
Sewing

 If you don't have a sewing machine (better yet, sewing cotton with sewing machines is hell), handsew with small stitches (backstitch style), to have a almost perfect sawing, put your pieces together and fix them with pins, then mark the fabric with an outline so that you have a guide to follow, start to saw Sew the body, starting by the shoulders, then attach the arms, saw the rest of the body and leave the neck open.
Turn inside out
Stuff it with fiberfill, this might get a bit tricky, but try to stuff it with a wooden stick or whatever you have in hand fill the legs first and the fill the arms, leave a space without fiberfill between the arms and the body, it will give movement to the arms.
Fill the head lightly and Fill the neck firmly, stitch the head and body openings.
THE HAIR
Some vids how to make the wig....sorry for the bad english :(
DRAWING THE FACE
Probably you are wondering how to print the correct size for the face graphic, what you need to do (I use photoshop) is choose the print preview and rezise the image about a forth of the size of an A4 sheet a bit larger maybe, print a draft and be sure the size of the stencil matches the size of the doll head, if it needs any correction resize again until you are satisfyed with the size.
Attaching the head
MATERIAL
First things first, what you need to start up your doll:
- Cotton Jersey: (for the body) or any type of fabric that seems like the fabric of which T-shirts are made of. (white is ok, but you will need to dye the fabric, I dyed the fabric of my dolls with coffee,actually I would not recommend this, since at some point you will have to wash the thingy and the color will wash away, so if you find fabric in a suitable color for the skin, buy that one)
- Polyester Fiberfill: as needed, normally this is sold in kgs, is rather cheap, I bought 1/2kg and it was enough to stuff 5 dolls.
- Cloth and accesories: ok, here you can get creative, you can totally skip buying fabrics for the wardrobe, look around your closet and take your oldest shirts, tshirts, pants etc, those that are about to be thrown and use them.
-Wool yarn (hair): you can use wool or that type of plush speacilly made for dolls hair, I don't know the name of it in english, so later i am going to post a picture of it. My dolls, have wool yarn hair, but if you want to trash your dolls, and sleep with them and use them as your pillows, you will have to use something that wont fall appart too easily.
- Acrilyc paints or Fabric paints: those are to paint the faces, if you are by now getting all stressed about how are you going to paint the face, relaaaax, just send us an email telling us who do you want to make as a doll, we will send you the graphics :)
-Cardboard: to make the patterns
-Chalk: to draw your patterns into the fabrics
-Needles and threads.
To all of you, I would really want to see your proyects, so when you finish them, please send us pics of them :) .
Magaly, WE NEED TO MAKE THE FREDDIE MERCURY ONE!.
- Cotton Jersey: (for the body) or any type of fabric that seems like the fabric of which T-shirts are made of. (white is ok, but you will need to dye the fabric, I dyed the fabric of my dolls with coffee,actually I would not recommend this, since at some point you will have to wash the thingy and the color will wash away, so if you find fabric in a suitable color for the skin, buy that one)
- Polyester Fiberfill: as needed, normally this is sold in kgs, is rather cheap, I bought 1/2kg and it was enough to stuff 5 dolls.
- Cloth and accesories: ok, here you can get creative, you can totally skip buying fabrics for the wardrobe, look around your closet and take your oldest shirts, tshirts, pants etc, those that are about to be thrown and use them.
-Wool yarn (hair): you can use wool or that type of plush speacilly made for dolls hair, I don't know the name of it in english, so later i am going to post a picture of it. My dolls, have wool yarn hair, but if you want to trash your dolls, and sleep with them and use them as your pillows, you will have to use something that wont fall appart too easily.
- Acrilyc paints or Fabric paints: those are to paint the faces, if you are by now getting all stressed about how are you going to paint the face, relaaaax, just send us an email telling us who do you want to make as a doll, we will send you the graphics :)
-Cardboard: to make the patterns
-Chalk: to draw your patterns into the fabrics
-Needles and threads.
To all of you, I would really want to see your proyects, so when you finish them, please send us pics of them :) .
Magaly, WE NEED TO MAKE THE FREDDIE MERCURY ONE!.
Monday, February 27, 2006
Due to the requests Maru have been receiving at the GDA forum, and to the receptive and frantic popularity of "Billito" with some of our closests friends, we've decided to open up a blog about dolls, YES!, here you can find out how to make your own dolls!!, actually, is really easy we will be uploading vids and pics, for all of you who never ever have had a needle on your hands....don't worry we will put our best effort to help you through your proyect.
Subscribe to:
Posts (Atom)
link


|
|

This work is licensed under a Creative Commons Attribution-NonCommercial-NoDerivs 2.5 License.


